So you’re going to illustrate a children’s book. Congratulations!
Before you grab a brush and start on a piece of finished art, a few decisions must be made. To name a handful : how many pages/spreads there are, where the type needs to be placed (this may be flexible), color or black and white, spot illustrations (small drawings that stand alone, with minimal or no background elements) or full bleed illustrations (meaning the entire page is covered to the edge) and most importantly, the dimensions of the book- thus directing the dimensions of the illustrations, which will ultimately help when you create the composition. Luckily you do not have to bear the burden of making all of these decisions alone. The Publisher will (most likely) provide the answers to most these questions for you, and if not, make sure you come to an agreement together so there are no surprises after you have put in the hours.
Size
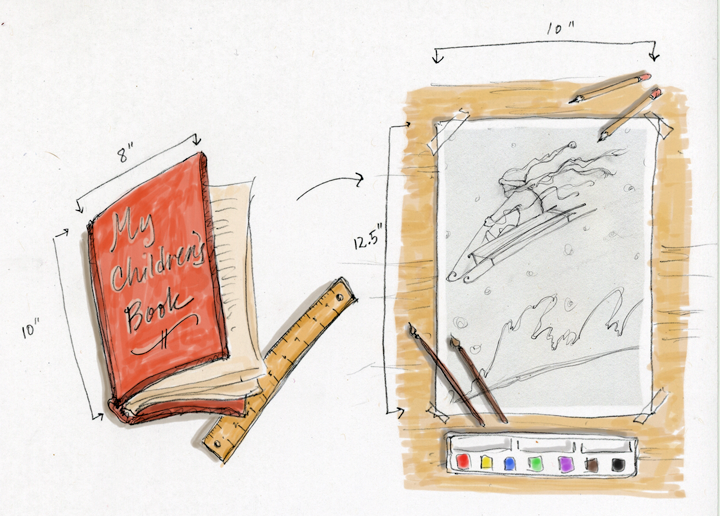
Sizes vary in the industry and thankfully the publisher will inform you of the size of the book or provide a choice of options for you to consider. You don’t have to work at 100% scale, and many times should not. Take a look at any juvenile book cover. Many of those are printed around 6″x8″ or smaller. Who wants to (and can successfully) work at that scale? Picture books have a larger standard (in the ballpark around 8×8, 8×10, 9×11…) but there are still benefits to working larger than the final print size. For one, you enjoy more freedom to experiment with various mediums. Secondly, when a final illustration is scaled down, a certain magic happens in which details become a little more crisp, edges sharpen up a bit, and I’ve even found that color intensifies.

Proportion
The most important thing to consider is maintaining proportion. For example, an 8″x10″ book proportionally increased by 25% would be 10″x12.5″ Never work smaller than the finished size, or you will loose image quality when you enlarge the image to fit the page. Also, try not to get too large either, or detail becomes lost when grossly scaled down. The trick is finding what percentage increase works with your work medium and style.
Bleed, Trim and Safe Zone
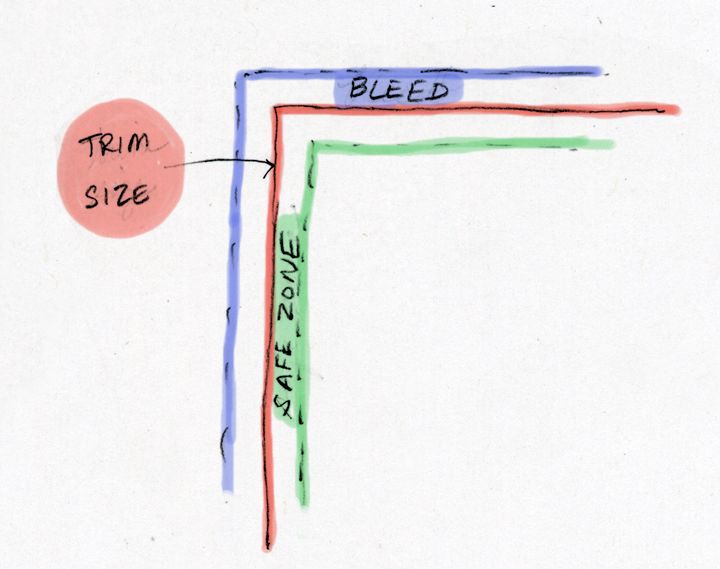
Remember to include a bleed of at least 1/4 inch. (This is the part of the illustration that runs off the edge of the page) So for the example mentioned, the 8″x10″ book illustrated at 10″x12.15″ would have an extra 1/4″ added around for the bleed, making the drawing 10.25″x12.75″ In addition, make sure to leave a safe zone (an area free of your main action) of about 1/4″ inside the trim area.
Materials
Medium? Type of Paper? That is up to you. However, the reason to address this decision is because it does have a relationship with the size of your work. For example, if you love cross-hatch work with a crow quill pen, that works great for smaller, more detailed drawings, but if you prefer a large round brush and acrylics, you will need larger surfaces. The key is to find your own “sweet spot” between your preferred media and the size of your work.

Happy experimenting!
Leave a Reply
You must be logged in to post a comment.